The One Big Score
"We pull this off, and we'll be set for life."
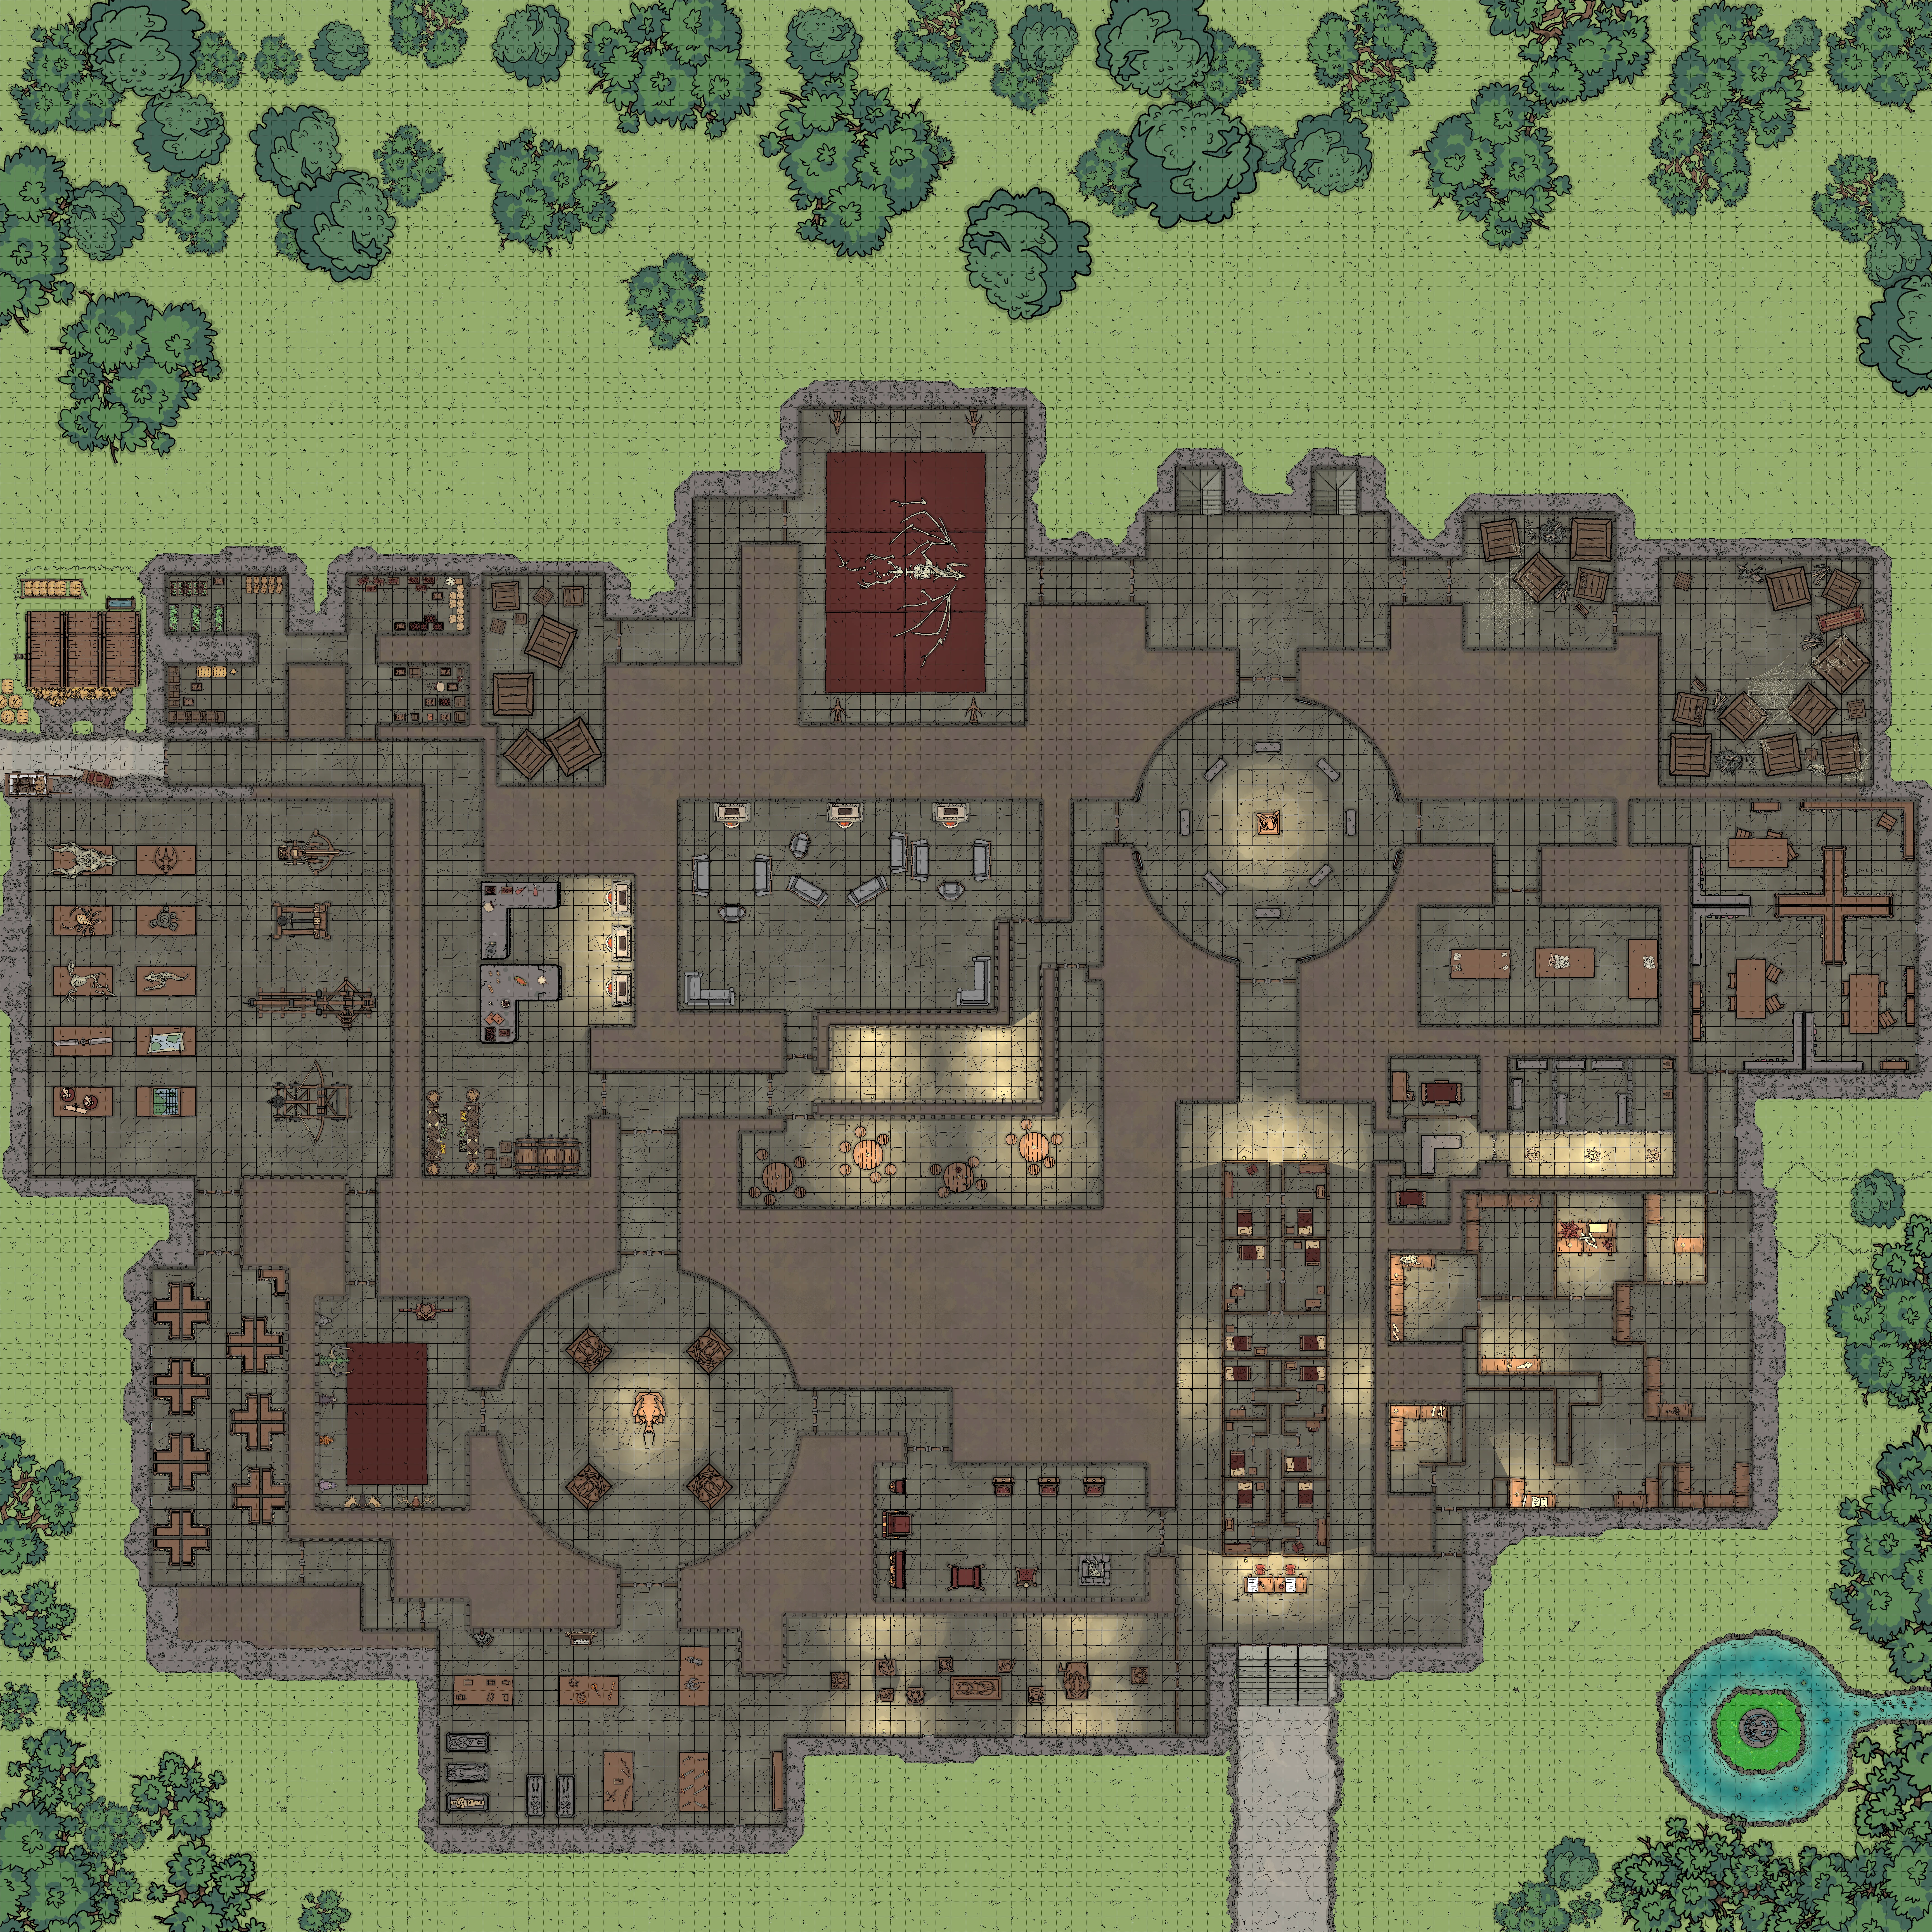
Welcome to The One Big Score — a high-octane, single-session heist where timing, teamwork, and daring are everything. Use the adventure tab to familiarise yourself with the target and security measures, then study the Map to plot your entry and exit routes. When the clock starts, every second counts.
Adventure Synopsis: The One Big Score
The One Big Score is a heist-themed adventure set in the bustling city of Waterdeep, designed for characters of levels 3-7. The adventure focuses on planning, scouting, and executing a high-stakes heist to steal a powerful artefact from the prestigious Library of Antiquities before it is sealed behind magical wards. The adventure balances elements of roleplaying, exploration, and tactical decision-making, and offers multiple potential outcomes based on player choices and actions.
Background
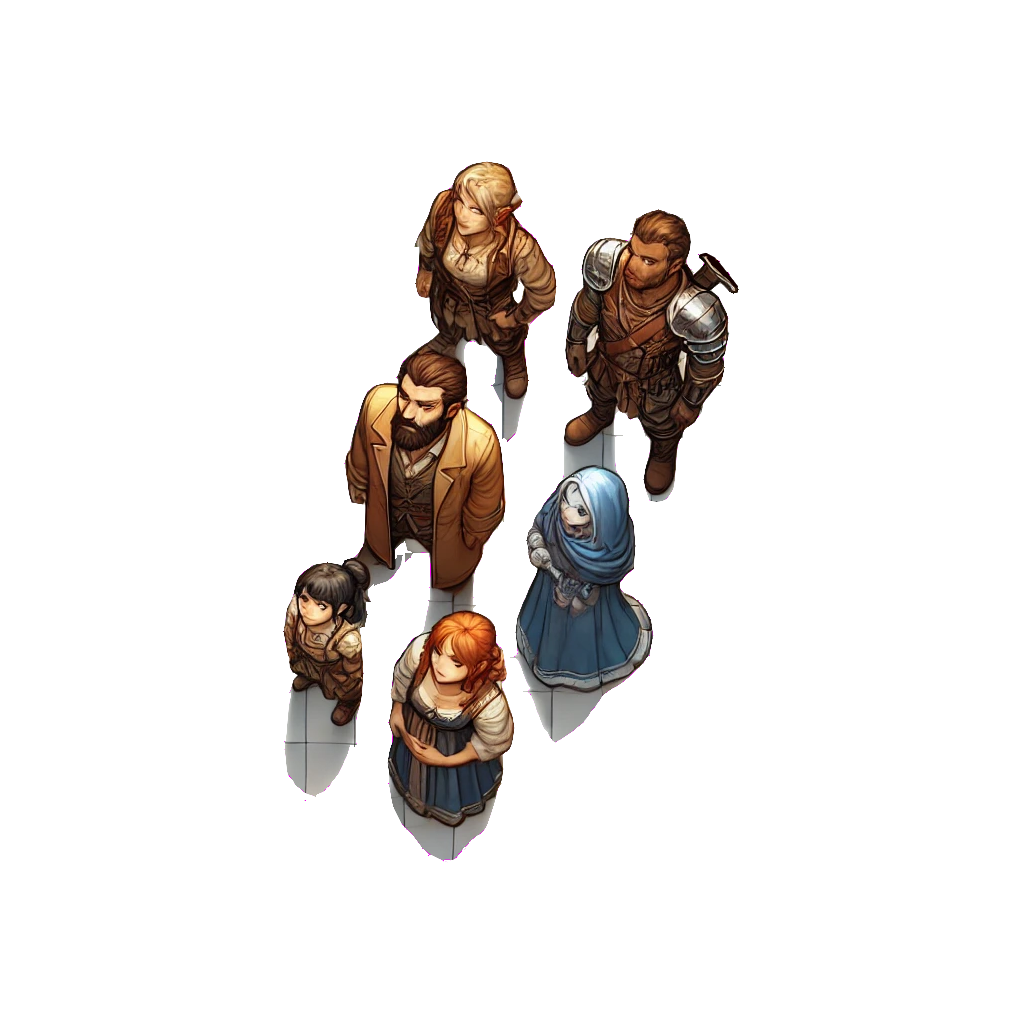
The players are brought together in the harbour district of Waterdeep through a series of events (outlined in the Scenarios) that leave them down on their luck, or owing a debt to the enigmatic Delaveen Dawngaze, a prominent figure in the Thieves' Guild. After being gathered in Delaveen's office, the players are presented with an opportunity to redeem themselves—or repay their debts—by retrieving an ancient artefact, the Bone Staff, from the heavily guarded Library of Antiquities.
Delaveen reveals that time is of the essence: the artefact will soon be sealed behind powerful magical barriers. The party must infiltrate the museum before dawn, locate the artefact, and escape without alerting the guards or triggering the magical wards.
The Heist Plan
Daytime Exploration:
During the day, the players can freely visit the museum under the guise of ordinary visitors. This phase allows the party to scout out the museum's layout, observe guard routines, and uncover hidden entrances or exits. They can gather information by talking to museum staff or using their skills to investigate potential threats, such as magical traps and concealed doors.
Night time Infiltration:
At night, the party returns to the museum under cover of darkness. The museum is now locked down with guards and traps in place, making stealth and tactical planning essential. Players must evade patrols, disable magical wards, and outwit any other obstacles that may stand between them and the artefact.
Complications
As the players near their goal, unexpected complications arise. A rival gang, the Sewer Rats, has also learned of the artefact and attempts to steal it for themselves. The players must either deal with the rival thieves or avoid them entirely, creating potential for a tense standoff or a high-speed chase through the museum halls.
Additionally, the artefact itself is heavily protected by magical wards and traps. Failure to disarm these protections could result in the players triggering an alarm or unleashing dangerous forces within the museum.
Resolutions
The adventure offers several possible endings based on the players' actions:
- Success: The players successfully retrieve the artefact and return it to Delaveen, where she reveals its true purpose—opening a portal to the Infernal Realm. The players are rewarded but left with lingering questions about the consequences of their actions.
- Partial Success: If the players manage to retrieve only part of the artefact (e.g., the Bone Staff but not the Crystal), Delaveen is disappointed but still rewards them, hinting at future jobs or the need to complete the heist at a later time.
- Failure: If the players are caught by the guards, fail to retrieve the artefact, or are outwitted by the rival thieves, they face harsh consequences. They may be captured by museum security, forced to deal with the wrath of Delaveen, or even trapped in the museum as magical wards activate.
In all cases, the adventure leaves room for future developments, either as a continuation of the heist or as a setup for future adventures tied to the artefact's mysterious power and Delaveen's hidden ambitions.
Introduction
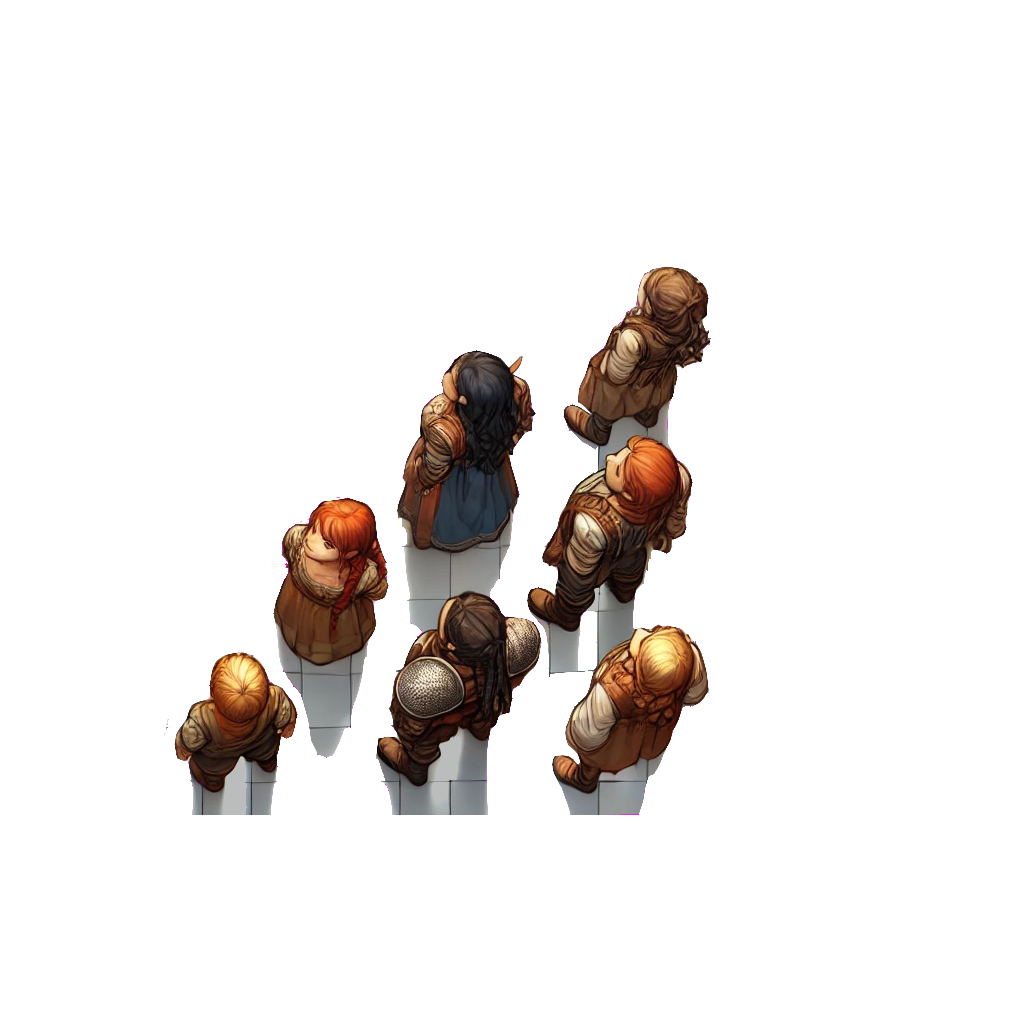
Choose or roll for one of the following scenarios to determine how the players are brought together and introduced to Delaveen Dawngaze:
Scenario 1: The Mysterious Letter
Down on your luck, you find yourself wandering the streets of the Bilgewater Docks in Waterdeep. Whether it's boredom or desperation that brought you here, you're unsure, but as you contemplate your next step, a small boy runs up and hands you a letter. The letter is old, with strange runes etched along its edges, and as soon as you take it, the boy dashes into an alley and disappears from sight.
The letter reads: "Adventurers wanted, no prior experience needed. All equipment and supplies will be provided by your employer. If interested, follow the directions below."
On closer inspection, the runes glow faintly. (Puzzle: Investigation/History DC 14, passive Investigation DC 15). As you brush your thumb against the runes, they react, drawing out a map of your surroundings in blood red ink. The map points to a location nearby: Delaveen Dawngaze's office.
New Quest: End of the Road. Follow the mysterious directions to Delaveen's office, where you will discover the true nature of the job being offered.
Scenario 2: The Unfortunate Gamble
After a long day of adventuring, you decided to relax with a drink and some gambling at Sheely's Bar and Brawl. Fortune smiled upon you, and after a big win, you treated everyone in the bar to a drink. In hindsight, this may have been a mistake. The next thing you remember is waking up in a dark cell, your hands and feet shackled. The room smells of damp stone and despair. Around you, other captives stir, and before long, the door creaks open to reveal a brutish half-orc guard.
"Time to see what fate has in store for you," he grunts. With a sharp yank on your chains, he hauls you to your feet and leads you through dim corridors to a grand room. Gilded patterns decorate the door, a stark contrast to the squalor you woke up in. As the door opens, you are brought into a candlelit office. Seated behind a large desk, an elven woman in a pinstriped suit—Delaveen Dawngaze—gestures for you to enter.
New Quest: Debt to Pay. You've been brought here against your will, and Delaveen has a job that will ensure your freedom—but not without its risks.
Scenario 3: The Loyal Guild Member
You've made a name for yourself in Waterdeep's Thieves' Guild. Though life in the guild has had its dangerous moments, it has also brought you respect and rewards. Your skills in theft, deception, and survival have not gone unnoticed, and today, you've been summoned for an important task. Word has spread quickly—this is no ordinary job, and success could cement your reputation as one of the guild's top operatives.
When you enter Delaveen Dawngaze's office, you see a mix of unfamiliar faces. She sits at her desk, motioning for you to take a seat. The job must be significant if Delaveen herself is overseeing it.
New Quest: The Big Score. You've been chosen for a job of great importance. Delaveen has gathered a crew, and it's up to you to help them execute the heist.
Scenario 4: The Stolen Heirloom
Returning home after a long day, you find your door broken open. Your home has been ransacked, and your most precious possession—a family heirloom—has been stolen. Left in its place is a note: "If you want your heirloom back, meet at Delaveen Dawngaze's office. We have a job for you."
With no other leads and the heirloom's fate in the balance, you make your way to the address written on the note.
New Quest: Desperate Measures. In search of your stolen heirloom, you are led to Delaveen Dawngaze's office, where you must decide whether to take on a dangerous job in exchange for its return.
Scenario 5: Blackmailed by the Watch
The City Watch has been keeping a close eye on you ever since you were spotted near a recent crime scene. Captain Rodrick, a high-ranking member of the Watch, has blackmail on you. Rather than throw you in jail, he offers you a way out: infiltrate the Thieves' Guild. In exchange for your freedom, you are to earn Delaveen Dawngaze's trust and help the Watch bring her down.
Rodrick provides you with forged credentials and sends you directly to Delaveen's office, where you are expected to blend in and gather information for this high-stakes heist.
New Quest: Between Two Worlds. Navigate the treacherous line between loyalty to the Watch and Delaveen, all while planning the theft of a priceless artefact.
Scenario 6: A Favour for an Old Friend
Your old friend, who you've shared many adventures with, has run into trouble. They owe a large debt to the Thieves' Guild, and the only way out is to help with a dangerous heist at the Library of Antiquities. Fearful of what might happen, they ask for your help, knowing you're the only one they can trust.
When you agree, they bring you to Delaveen Dawngaze's office, where you meet the others involved in the job.
New Quest: Friend in Need. Assist your friend with the heist, but be prepared to face the consequences if things go wrong.
Scenario 7: The Mysterious Benefactor
Out of the blue, you receive an offer too tempting to ignore. An anonymous benefactor promises wealth and power in exchange for your participation in a grand heist. The instructions lead you to Delaveen Dawngaze's office, where you are told that the target is an artefact of great power, one that could change the fate of Waterdeep itself.
The letter provides no further details, but you sense this job will be unlike anything you've done before.
New Quest: Shadows and Secrets. Follow the mysterious invitation and see what the benefactor truly wants. Is the promise of power worth the risk?
Scenario 8: The Fated Encounter
While wandering the city streets, you feel a strange pull toward an unknown destination. It starts as a mere curiosity, a feeling like you're being watched, but soon becomes an unshakable sense that you are being guided by something beyond your understanding. The path leads you through the winding alleys of Waterdeep, until you arrive at an ornate door, with the name Delaveen Dawngaze etched into a brass plaque beside it.
As you hesitate, the door opens, and you are greeted by a calm voice: "We've been expecting you."
New Quest: Destiny's Call. Follow this strange compulsion into Delaveen's office, where you will learn the true reason you were led to this place and how it connects to the heist.
Scenario 9: The Job Gone Wrong
Your latest job didn't go as planned. What should have been an easy score turned into a disaster, and now, you're on the run from the City Watch and rival thieves alike. Desperate for a way out, you receive word from a contact that there's a new opportunity to make things right—a high-stakes heist that could wipe your slate clean and get you back in favour with the underworld.
The contact provides you with directions to Delaveen Dawngaze's office, where you'll be given the details of the job. It's risky, but at this point, what other choice do you have?
New Quest: One Last Chance. Redeem yourself by taking on Delaveen's job, but be prepared for the consequences if this heist goes awry.
The Motive
Sat behind the desk is a striking young-looking elf with long, sweeping brunette hair, dressed in a black pinstriped suit paired with a crisp white blouse. Thin glasses rest on the bridge of her button nose, with a delicate chain draped down the back of her neck. As her eyes scan the room, she addresses you:
"Well, as we are all here, my name is Delaveen Dawngaze, and I am the Master of Bookkeeping here—the person for whom you will be working on this fine day. I'm sure you have questions, but I ask that you keep them to yourself for now, as we have a lot to cover and time is not on our side. But, as we get started, may I offer anyone some tea?"
She stands and moves gracefully to prepare tea, her thigh-high skirt, matching her suit, hugging her form. The striking ruby-red high heels she wears draw your eye as she moves.
"Some of you have been handpicked for this job, while others owe a substantial sum of gold and will be repaying that through indentured service. It is a service I would advise against breaking."
(She hands tea to the fighter classes.)
"Now, please introduce yourselves, and share your particular skill sets. I will be making notes."
(Aelinthaldaar – The ancient Elvish city on which Waterdeep was built.)
"Slan says that an item has just been delivered to the Library of Antiquities. We, your current employers—or masters—would like you to retrieve this item for our client. We have until tomorrow morning to break in and retrieve it before it is catalogued and sealed behind a magical barrier, which would make its acquisition impossible."
She gestures to the door. "The Library of Antiquities closes its doors to the public at 6pm. Prepare accordingly."
The Planning Stage
During the day, players can explore the museum to gather information and prepare for the heist. This phase focuses on scouting, gathering intel, and laying the groundwork for the night-time infiltration.
Scout Out the Museum for Potential Ingress and Egress Points
Perception (DC 12-15): Spot windows, doors, or other entrances and exits.
Investigation (DC 14-17): Find concealed or less obvious routes, such as hidden doors, vents, or tunnels.
Stealth (DC 12-14): Avoid looking suspicious while scouting sensitive areas.
Determine Guard Numbers and Shift Patterns
Insight (DC 12-14): Observe guards' routines and shift patterns.
Persuasion or Deception (DC 15-18): Subtly question museum staff or guards about security details.
Stealth (DC 14-16): Follow or observe guards without being detected.
Locate the Artefact's Storage
Arcana (DC 15-18): Sense magical protections or wards around valuable items or areas.
Investigation (DC 14-16): Search for maps, documents, or other clues pointing to the artefact's location.
Persuasion (DC 12-15): Extract useful information from museum staff without raising suspicion.
Disable Any Magical Protection Around the Item
Arcana (DC 17-20): Identify and disarm any magical wards or traps protecting the artefact.
Thieves' Tools (DC 16-18): Disable mechanical or magical traps.
Perception (DC 15): Spot subtle magical triggers or alarm systems.
The Execution
Once the planning phase is complete, it's time for the players to put their plan into action. Let the players decide how they will approach the heist based on the information they gathered during the day.
Player Decisions
The players should use the map, guard shift details, and any intel they gathered to execute the heist.
Encourage them to collaborate on their approach, whether it involves stealth, deception, or force.
If the players have created a map and marked down guard placements, provide them with the Drawn Map Handout to aid in their execution.
Key Considerations
Unexpected Obstacles: Introduce complications such as additional guards, magical traps, or rival thieves if the players' plan seems too smooth.
Player Creativity: Encourage creative problem-solving. Allow them to adjust their plans if things start to go wrong, based on the real-time situation.
Use the details from the planning phase, and guide them through the heist step by step, ensuring that their choices matter in how the events unfold.
The Complication
Just as the players are about to steal the artefact, an unexpected complication arises. Word reaches the players that a Duke and his entourage have arrived for a sneak peek at the artefact, claiming to have special permission. However, this is a ruse. The "Duke" and his entourage are actually a rival gang, the Sewer Rats, using Disguise Self and charm spells to infiltrate the museum.
Rival Gang's Actions
The rival gang talks their way into a private viewing with the museum staff.
Once inside, the gang ambushes the guards, killing them and beginning to loot the museum.
Player Options
Option 1: Steal the Artefact: The players can attempt to steal the artefact while the gang is distracted by looting. This requires careful timing and stealth.
Option 2: Confront the Sewer Rats: The players can confront the rival gang head-on. This could lead to a combat encounter or a tense standoff.
Possible Outcomes
Chase scene: If the players choose to steal the artefact or if the confrontation goes awry, the Sewer Rats may pursue them, leading to a chase through the museum or the city streets.
The Resolution
Returning to the Thieves' Guild
If the players successfully steal the Bone Staff and/or The Crystal and return them to the Thieves' Guild, here's how events could unfold:
Ending 1: Returning Both Artefacts
Upon returning with both the Staff and Crystal, Delaveen Dawngaze, the Master of Bookkeeping, congratulates the players. However, she seems entirely focused on the artefacts. After accepting the items, Delaveen swiftly combines the Staff and Crystal. The combination of the two artefacts releases a surge of powerful energy, and a portal to the Infernal Realm opens in one of the walls of her office.
The Infernal Portal:
The portal appears as a swirling, fiery vortex in the wall, casting an ominous glow across the room. As the players look on, Delaveen examines the portal, clearly pleased with her success. The portal briefly flickers, revealing a glimpse of the Infernal Realm, where rivers of lava and shadowy figures can be seen in the distance.
Portal Deactivation:
Once Delaveen confirms that the portal works, she deactivates it, closing off the connection to the Infernal Realm. She turns to the players, offering her gratitude for retrieving the artefacts.
Delaveen's Ambition:
Delaveen may hint at her larger plan—to use the portal for interplanar travel, allowing her or the Thieves' Guild to exploit the resources and power of the Infernal Realm. She may not share the full details, leaving the players wondering what they've helped unleash. Alternatively, if the players press her, she might reveal a little more about the Thieves' Guild desire to gain control over infernal forces or entities, suggesting the Thieves' Guild has more in store for the players down the line.
Possible Rewards:
Delaveen rewards the players with releasing any hostage they had or offering them a job, but also notes that the success of this task means the players may owe the Thieves' Guild a favour, setting up potential future jobs or adventures.
If the players are concerned about the portal, Delaveen might be dismissive or attempt to reassure them that the portal is under control, hinting at deeper secrets.
Ending 2: Returning Only One Artefact
If the players return only one of the artefacts (either the Staff or the Crystal), Delaveen expresses disappointment but still rewards them. She hints that the incomplete artefact could still be useful, but that it won't unlock its full potential without both pieces. She may suggest future jobs to complete the set or leave the players with an uneasy sense that their mission isn't truly over.
Complications:
If the artefacts remain incomplete, there could still be residual magical effects—nightmares, flickering visions of the Infernal Realm, or mysterious whispers in the players' minds. Delaveen may also warn the players of unforeseen consequences from leaving the artefact in its incomplete form.
Shattering the Staff or Crystal
If the players choose to break either the Staff or the Crystal, the consequences are significant:
Shattering the Staff:
Breaking the Staff while in the Infernal Realm will immediately close the portal and transport everyone nearby back to the Material Plane.
Return to the Material Plane:
Upon returning to the Material Plane, the players may face consequences for having destroyed such a powerful artefact. Delaveen may be enraged if she learns of its destruction, or the players may be cursed by infernal forces for their actions. In any case, the Thieves' Guild may still reward them, but future jobs could involve dealing with the fallout of their actions, such as rival factions or infernal entities seeking retribution.
Shattering the Crystal:
Breaking the Crystal while in the Infernal Realm will immediately close the portal and transport everyone nearby back to the Material Plane.
Destroy nearby infernal creatures or corrupt the players with infernal traits (such as infernal whispers, fiendish abilities, or lingering curses).
Teleport the players back to the Material Plane, but with lasting consequences tied to the crystal's destruction (such as being haunted by infernal beings or cursed visions).
The Escape
See the Chase Section
The Artefact
The Crystal
The crimson shard pulses with an eerie, internal light, as though it holds the molten core of a dying star. Dark veins ripple through its jagged surface, where heat flickers like embers trapped within stone. The crystal's sharp edges almost hum with malevolent energy, and faint red tendrils of arcane power drift off it, dissipating into the air. The base of the crystal tapers into a perfect point, too precise to be a natural formation, suggesting it is meant to fit into something larger. Upon closer inspection, grooves along its base confirm it is not a standalone object.
The Bone Staff
The staff is a terrifying work of art, made from twisted, pale bones that seem unnaturally warped and woven together. Dark cracks crawl along its surface, oozing faint wisps of shadow, as though the staff itself is barely containing the forces within. At the top, the skull of a horned beast grins wickedly, its eye sockets vacant except for the occasional spark of black energy. Twisting vines of bone spiral up the length of the staff, forming a cradle-like indentation just beneath the skull—clearly designed to hold something, possibly the crystal.
If the Two Halves Are Combined
If the players combine the crystal and the staff, all the players and any NPCs present are immediately transported to an Infernal Hell Realm, the portal activated by the dark energy released from the union of the two artefacts.
Daytime Exploration
During the day, the players can explore the museum to gather information and scout potential weaknesses. The museum is bustling with activity, and guards are stationed throughout.
Entrance
A steady line of people walks up to two desks where they pay 50 silver to the elves sitting there.
Hall 1
Visitors move about, admiring the statues on display.
Hall 2
People examine the various displays, while a guard walks around keeping watch. The sarcophagi seem large enough to hide in, but all the weapons and instruments on display look old and fragile, likely to break if used.
Hall 3
Visitors circle around display cases, with guards stationed near the doors. Sunlight streams through the windows, illuminating signs on the war machines that read "Do Not Touch."
Hall 4
The heads of various beasts are mounted on the walls, each with a corresponding illustration of how they appear in the wild. At the centre is a totem featuring four animals: a turtle, a bear, a lynx, and an owl.
Hall 5
This hall is lined with furniture, including ornate boxes. One of the thrones, carved from granite, has a skeleton seated upon it. A rope surrounds it, with a sign that says "Do Not Cross." A guard stands nearby, watching as people approach the display. The players may attempt to speak with the undead, but only at night.
Public Library
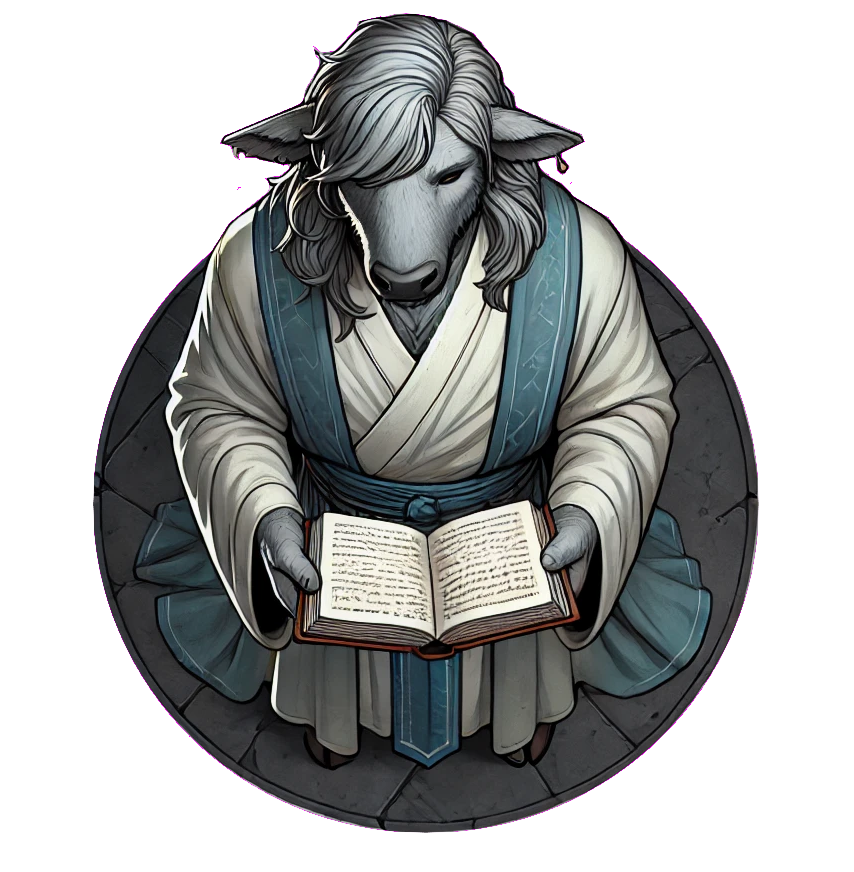
Stacks of books line the old oak bookcases. People browse the collections while a Firbolg in long robes pushes a cart, returning books to their rightful places.
Kitchen
The kitchen is alive with activity as waiters move food and drink to and from the eating area and lounge. An elven chef uses mage hand to assist with the preparation, while a Tortle chef stirs a large pot at one of the stoves.
Larder
The larder is full of ingredients and boxes of imported food and drink.
Lounge
People sit chatting, smoking, and drinking. Waiters periodically take orders and return with food and drink. The open hearths crackle with a soft, warm glow.
Eating Area
Visitors sit, enjoying their meals and drinks, with waiters taking orders at regular intervals.
Storage 1
An old storage room filled with boxes, some large enough to hide in.
Storage 2
Another storage room. A locked door at the back of the room requires a DC 12 check to unlock.
Storage 3
This storage room contains boxes large enough to hide in, as well as a coffin. Inside the coffin lies a body, shrivelled like a dried fruit left in the sun for too long.
Research Lab 1, 2, and 3
All three research labs are off-limits to everyone.
Warden's Office
Two guards sit at a desk writing paperwork, though the warden's office itself appears empty.
Jail
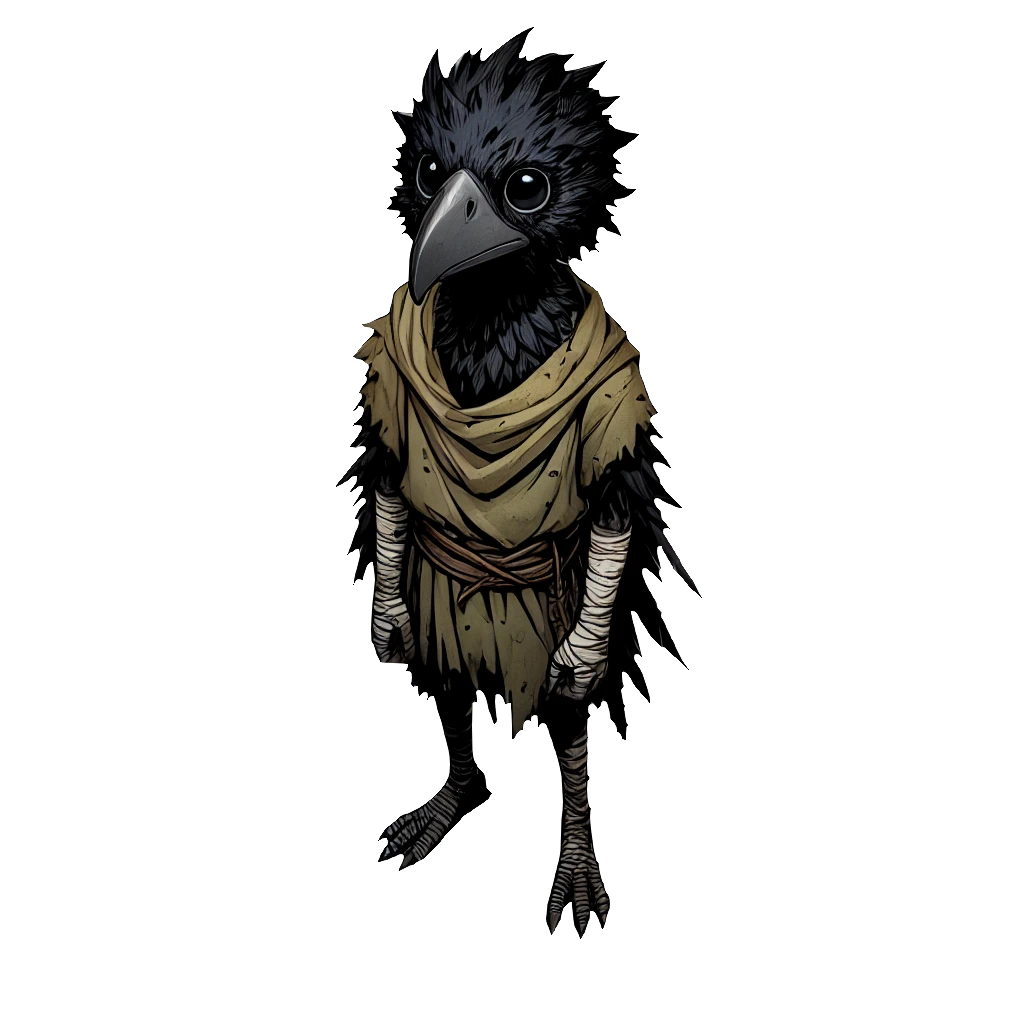
A Kenku with white and black plumage—its black feathers carrying a slight blue shimmer—sits in one of the cells, chittering to itself.
Accommodation (Staff and Guards)
These rooms are locked, and no one is currently inside.
The Beast
Four statues of men stand facing a bronze statue of a Hellhound.
The Angel
(Details for this location have not been provided.)
The Great Protector
A dragon skeleton lies on the floor, with four dragon statues on the walls, all facing toward it. At the far end of the room, a locked door bears a sign that reads "No Entry."
Dragon Statue (Outside)
Just beyond the museum's entrance, a beautifully landscaped park stretches out before you. At its centre stands a towering dragon statue, coiled upon a pedestal in the middle of a calm pond. The sunlight glints off the surface of the water, illuminating the intricate details of the dragon's scales and wings. The statue's imposing presence exudes an air of ancient mystery, as if it has guarded this area for centuries. Visitors often stop to marvel at its craftsmanship, while the surrounding trees sway gently in the breeze, casting long shadows across the clearing.
Night-time Infiltration
As the museum closes, the once bustling halls fall silent. The visitors are gone, and the rooms now echo with an eerie stillness. Only the guards remain, and the shadows seem to stretch longer in the moonlight. The players must now navigate the dark, quiet museum under the cover of night, taking care to avoid detection.
Entrance
A single guard sits at the desk, his eyes occasionally darting around the room as the silence grows heavier.
Hall 1
The hall is dimly lit by flickering torches mounted on the walls. Their weak light casts long, shifting shadows over the statues.
Hall 2
The hall is almost completely dark, with only the pale moonlight seeping through the windows, casting strange, angular shadows across the floor.
Hall 3
Moonlight streams through the large windows, illuminating the war machines. Their metal frames gleam under the cold light, the signs reading "Do Not Touch" barely visible in the darkness.
Hall 4
The heads of the beasts mounted on the walls seem to watch your every move. The feeling that their eyes are following you is almost too strong to ignore, as a chilling breeze drifts through the room.
Hall 5
The skeleton seated on the granite throne shifts ever so slightly in the torchlight. It won't know where the artefact is but remembers something new arriving this week. It knows the guards' shifts and offers this information in exchange for a gold coin and a handshake. Be warned: touching the chair or skeleton will trigger Vampiric Touch (3d6 necrotic damage, healing the skeleton for that amount).
(Use skeleton stats from the Monster Manual with level 5 wizard spells, including Vampiric Touch.)
Public Library
The library is eerily quiet, the bookshelves casting long, dark shadows. The faint sound of rustling pages can be heard, but there's no one in sight.
Kitchen
The kitchen, once bustling with activity, now sits silent. Cold, untouched food sits on the counters, and the fires have all gone out.
Larder
The larder is filled with crates and sacks, all sitting undisturbed. The silence is oppressive, as though the food itself is waiting for something.
Lounge
The lounge is deserted, save for the soft crackling of the embers in the hearth. The faint smell of smoke lingers, but there's no sign of the earlier patrons.
Eating Area
The tables are now empty, with half-eaten meals left behind by the hurriedly departing guests. The room is deathly quiet, except for the occasional clink of cutlery still resting on the tables.
Storage 1
Boxes fill this dark room, some large enough to hide in. The silence is heavy, as though the objects inside are waiting for something to disturb them.
Storage 2
A locked door at the back of the room (DC 12 to unlock) stands ominously. The room is otherwise silent, but something about the door feels... wrong.
Storage 3
The lid of a coffin stored here creaks open, and the body inside begins to stir. The withered form of an undead Dragonborn wizard rises, speaking in Draconic. To those who can't understand, his words sound harsh and aggressive, but he's merely asking: "Who are you, and why have you woken me?"
The players can choose to fight or befriend him. If they fight, use a level 4 sorcerer build. If they befriend him, he may assist them during their heist.
Name: Verdax.
Research Lab 1
Research papers and objects clutter every desk. Several candles still burn, their flickering light illuminating crystals on one of the desks. The players can take these crystals, but it's important to note who took them, as this will affect the final act.
Research Lab 2
The room is filled with stacks of books, most of which seem ordinary. The players can spend time searching through them to find potentially magical tomes.
Research Lab 3
This lab contains three desks, all cluttered with papers and items. A skeleton holds a staff, and among the papers are a spellbook, a staff, and a golden skull.
Warden's Office
The office is empty, but faint sounds of guards can be heard in the distance. The room is sparsely furnished, with a few documents scattered on the desk.
Jail
The cells are silent except for the occasional chittering of a Kenku prisoner, its white and black plumage glimmering faintly in the darkness.
Accommodation (Staff and Guards)
These rooms remain locked and all of the guards are presently inside.
The Beast
Upon entering the room, a shimmering light runs down the walls to the floor, slowly moving towards the statues. Anyone using Detect Magic will see magical gems embedded in the hilts of the swords of the four statues of men. The light runs up to the swords, which transform from bronze to chrome steel. Once all players have entered or the doors are closed, the doors silently lock.
Touching any of the statues or doors triggers an encounter. The statue of the Hellhound heats up, steam rising from its back. The bronze begins to melt, revealing a rust-red hound with glowing red eyes. Its body is marked by cracks, resembling cooling lava, and its teeth and tongue are soot black. The Hellhound will pursue one target at a time but can switch focus.
(Use the stats from the D&D 5e Monster Manual for the Hellhound.)
Defeat Options: Kill it normally, banish it, or smash the gems to force it back to the hellish plane.
Special Note: If the Hellhound downs a character, it will devour one of their limbs. This results in permanent disfigurement, though body augmentation can replace the limb.
The Angel
A shimmering light moves along the walls before settling on the statue. Anyone using Detect Magic will see magical gems embedded in the statue's eyes. Once the light reaches the gems, the eyes glow jade green. If no one stands in the doorway or once the doors close, they silently lock.
Touching the doors or statues triggers an encounter. The statue's eyes shoot out a beam of green light, ricocheting across mirrors around the room, until the mirrors merge the players' images. The statue's head turns to face the party, taking on the form of one of the players.
(Use the player's stats for combat.)
The Great Protector
Four dragon statues hang from the walls, acting as a security system. Each statue is equipped with the following spells:
Fire Bolt: On a hit, the target takes 1d10 fire damage. Flammable objects ignite if they aren't worn or carried.
Ray of Frost: On a hit, the target takes 1d8 cold damage, and their speed is reduced by 10 feet until the start of their next turn.
Acid Arrow: On a hit, the target takes 4d4 acid damage immediately and 2d4 acid damage at the end of its next turn.
Lightning Lure: The target must succeed on a Strength saving throw or be pulled 10 feet toward the statue and take 1d8 lightning damage if within 5 feet.
Dragon Statue (Outside)
Under the cover of night, the once-peaceful park has taken on a far more sinister atmosphere. The dragon statue, now shrouded in moonlight and shadow, looms ominously in the centre of the park. The waters of the pond reflect the silvery glow of the night sky, but something about it seems unnatural—too still, almost as if the pond has frozen in time. The statue's stone eyes gleam faintly, casting eerie reflections across the surrounding grounds.
The Museum – Infernal Hell Realm
Curse Tracker
The players are no longer in the familiar halls of the museum. They have been transported to an infernal version of the museum, twisted and corrupted by the malevolent forces of this hellish plane. The air is thick with the scent of sulphur and ash, and the once-pristine halls are now broken, molten, and dangerous.
Entrance
The entrance is mostly destroyed, with only the doorways and the crumbling steps remaining. The ground around the steps is cracked and splintered, with small eruptions of fire and lava occasionally spurting from the cracks.
Hall 1
The statues are all disfigured and broken, their faces twisted into expressions of agony. The marble has turned into obsidian, and faint whispers seem to emanate from the cracks in the stone.
Hall 2
Most of this hall has been reduced to rubble. A narrow, crumbling walkway remains, suspended over a pool of bubbling lava. A small ledge allows players to jump back to Hall 1, but the ground beneath them is unstable.
Hall 3
Completely destroyed, this area is now filled with flowing rivers of lava. The intense heat radiates through the air, and there is no safe passage across.
Hall 4
The mounded heads mounted on the walls are now grotesque, corrupted versions of their former selves. Their eyes glow with a hellish red light, and their mouths move as if they are whispering, though no sound can be heard.
Hall 5: Gold Looting and Curses
A treasure hoard lies scattered across the room, shimmering gold and jewels. However, taking the gold comes with a cost—greed will curse those who take it. The more gold taken, the worse the curse.
Handful: 4-D6 gold
Bagful: 5-D12 gold
As much as they can carry: 6-D10 X100 gold
However, if they take any amount of gold, they will be cursed according to the following:
Handful – Curse of Bad Luck: Greed whispers to fate itself, and the character's actions seem ever-so-slightly manipulated by unseen forces working against them.
Curse Effect: The GM gains the ability to invoke "Bad Luck" against the cursed player, once per day. This works like the Luck Feat but in reverse: whenever the cursed player rolls a D20, the GM may choose to force the player to reroll the result and take the lower of the two rolls.
Removal: The curse can only be lifted by returning an equivalent amount of gold taken to the same location or by performing an act of selfless charity, such as giving away an equivalent amount of gold to the poor.
Bagful – Weight of Greed: The avarice of taking a bagful of gold weighs heavily on the player, both literally and figuratively. Their body is dragged down by the unseen weight of their greed.
Curse Effect: The character's suffer a -2 penalty on all Dexterity or Strength checks, including attack rolls. Their movement speed is also reduced by 5 feet. This invisible burden makes it feel as though the air around them is thicker, and every action they take is more laborious.
Removal: The curse can only be removed by returning double the amount of gold taken to someone in need, such as donating the gold to charity or giving it to a family in dire straits. Alternatively, the player could sacrifice a valuable personal possession of great worth.
As Much as They Can Carry – Touch of Misfortune: In their overwhelming greed, the player becomes a beacon for terrible luck, as malevolent forces twist fate itself against them. The consequences are catastrophic.
Curse Effect: Whenever the character rolls a natural 20, it is treated as a natural 1 instead, turning critical successes into catastrophic failures. The cursed character also becomes a magnet for mishaps—equipment breaks unexpectedly, accidents occur in the environment, and allies might suffer misfortune when around them.
Removal: The curse can only be lifted by a grand ritual performed by a powerful cleric or mage, which requires the character to offer up rare treasures or artefacts of equal value to the amount of gold they initially stole. The ritual must be performed in a location of great spiritual significance.
Public Library
The once grand library is now mostly destroyed. Ash covers the floor, and large tracks lead toward a river of lava, left behind by some massive infernal creature.
Kitchen
The kitchen is in ruins. Rotten, dried-out food lies on the counters, untouched for what seems like centuries. The fireplaces have long gone cold.
Larder
One of the larders has been completely destroyed, with only rubble remaining. The other still holds rotten food, now petrified and crumbling.
Lounge
The once luxurious lounge is now in disarray. Furniture has been smashed, and some of it piled near the doors, as if used for a barricade. The fireplaces have long since gone out, and the air is heavy with the smell of sulfur.
Eating Area
The eating area has been completely destroyed, replaced by flowing rivers of lava.
Storage 1
This storage area remains mostly intact, providing a rare safe space where the players can hide or rest briefly.
Storage 2
Destroyed, with nothing left but a chasm of lava where the storage room once stood.
Storage 3
Similarly destroyed, with molten lava flowing through the remains.
Research Lab 1
The lab has been reduced to a smoking ruin, with molten rock flowing where desks once stood.
Research Lab 2
The lab is destroyed, with only the faintest traces of what was once an academic space. Books and research papers have been incinerated.
Research Lab 3
Completely destroyed, the floor now nothing but burning stone.
Warden's Office
The office has collapsed, with molten rock bubbling through the wreckage.
Jail
The cells remain, though the walls are cracked and crumbling. The heat from the surrounding lava makes the room unbearable.
Accommodation (Staff and Guards)
All accommodations have been destroyed, the walls caving in under the intense heat of the infernal realm.
The Beast
The Hellhound statue remains, but it is now chained to the ground by glowing, red-hot chains. The faces of the four guard statues are twisted into expressions of malice. The heat radiating from the Hellhound is overwhelming, and the chains seem to pulse with energy, hinting at the beast's impending release.
The Angel
The statue is a broken, twisted figure, shackled painfully to the ground. If the players unbind the angel, it will begin to fade from this plane. However, the remaining shards of mirrors around the room offer glimpses of a devil walking among the players (Perception check DC 14 to notice). The devil watches, amused, and if the angel is freed, the devil demands one of the players take its place. The devil offers no help and seems to revel in the players' dilemma.
The Great Protector
The bones of the dragon glow with an eerie green aura. Upon investigation, the dragon stirs and awakens. The players can attempt to convince the dragon they mean no harm (DC 18 Persuasion check), but if they fail or provoke the dragon, a deadly encounter ensues.
Dragon Statue (Outside)
The dragon statue remains outside, its once impressive visage now marred by cracks and molten veins of lava flowing through it. The heat emanating from the statue is oppressive, and it seems poised to come to life at any moment.
The Chase
Chase Round Tracker
Chase Mechanics:
During the chase, each round will consist of players using different skills to avoid or escape their pursuers, but no player can use the same skill as another player in the same round. This encourages players to collaborate and think strategically about their skill use.
1 skill per round, per player: Once a skill is used by one player during a round, it becomes unavailable to the rest of the group for that round, forcing each player to choose a unique skill to contribute to the chase.
Skill challenges will be used to outmanoeuvre, hide, or otherwise survive the chase.
The chase will conclude in the Museum itself, with no change of location, ensuring a tense, enclosed scenario.
Scenario 1: The Players Combine the Staff and Crystal (Hell Realm Dragon Chase)
If the players combine the Staff and Crystal and are transported to the Infernal Hell Realm, they will awaken the Dragon from the Great Protector Room.
Dragon Awakening:
The Dragon's bones glow with a green magical aura, and if the players investigate, they might be able to convince the Dragon that they are not a threat. This requires a successful Persuasion check (DC 18), or a battle ensues. However, if the players fail or decide to flee, the Dragon will begin to chase them through the museum.
The Hell Realm Dragon:
The Dragon has an eerie skeletal form, bound by magic to the Infernal Realm, with green glowing bones and the ability to breathe hellfire. It is intelligent, malicious, and extremely dangerous.
The Dragon's tactics during the chase involve:
Using its hellfire breath to collapse museum displays and set the floor ablaze, cutting off potential escape routes.
Ripping down walls or destroying parts of the museum in its pursuit, causing hazards that players must dodge or avoid.
Magical influence—the Dragon can project fear effects onto the players, potentially slowing them down or causing them to take risky routes.
Chase Skill Checks:
In each round, every player must contribute using a unique skill. If a player uses a skill, no other player can use that same skill during the same round. The players must succeed in several group ability checks to escape the Dragon. For this scenario, each check will be against a DC of 14-18, depending on the intensity of the situation.
Examples of skill checks:
Athletics (DC 14-16): Sprinting across the museum or vaulting over obstacles as the Dragon tears through the halls.
Acrobatics (DC 14-16): Dodging the Dragon's fiery breath or slipping through narrow gaps between collapsing structures.
Survival (DC 15-18): Finding a safe path through the museum to avoid the destruction caused by the Dragon's rampage.
Perception (DC 13-16): Spotting potential dangers ahead or noticing a hidden passage or structure to evade the Dragon.
Stealth (DC 15-17): Hiding from the Dragon in the shadows or behind displays, allowing the players to momentarily lose its attention.
Arcana (DC 15-18): Detecting lingering infernal magic in the museum to find a way to slow the Dragon or block its path.
Persuasion (DC 18): Attempting to reason with the Dragon or at least distract it momentarily to gain ground.
Chase Conclusion:
The chase ends in the Museum, and if the players succeed in enough rounds (typically 3-5 successful skill checks), they manage to either:
Trap the Dragon using their environment, such as collapsing walls or locking it in a room.
Escape through a hidden exit or area of the museum, leaving the Dragon to continue searching for them in vain.
If the players fail too many checks, they are either cornered, leading to a final battle with the Dragon, or must attempt a desperate final escape, potentially losing some items or even an ally to the Dragon's wrath.
Scenario 2: The Players Keep the Staff and Crystal Separate (Jaxx Rickard Chase - Night Scene)
If the players decide to keep the Staff and Crystal separate and try to escape the museum during the night, they are chased by Jaxx Rickard and his gang, the Sewer Rats.
Jaxx Rickard and the Sewer Rats:
Jaxx is a skilled rogue who leads the Sewer Rats, a gang of thieves. He is cunning and relentless, using every trick at his disposal to catch the players and take the artefacts for himself.
Tactics:
Jaxx and his gang will use shortcuts and sabotage to trap or corner the players.
They may attempt to block exits, trigger traps, or send members of their gang to cut off the players' escape routes.
Jaxx himself will use his rapier and sleight-of-hand to try and steal the artefacts directly if the players get too close.
Chase Skill Checks:
In this chase, the players must once again use different skills each round to escape from Jaxx and his gang. The skill checks should reflect the more urban and chaotic environment of the museum at night, with the focus on evading a group of skilled thieves. Each check will be against a DC of 13-18, depending on the situation.
Examples of skill checks:
Stealth (DC 13-16): Hiding in the darkened museum or blending into the shadows to evade Jaxx's watchful eyes.
Deception (DC 14-17): Creating a distraction, such as knocking over a display or leading the Sewer Rats down a false path.
Acrobatics (DC 14-16): Leaping over obstacles, squeezing through tight spaces, or balancing across narrow beams to escape.
Athletics (DC 14-17): Running at full speed to put distance between the players and Jaxx's gang.
Insight (DC 14-16): Predicting Jaxx's movements or anticipating where the Sewer Rats might ambush them.
Perception (DC 13-16): Spotting safe passages, hidden routes, or potential dangers as they navigate through the museum.
Intimidation (DC 15-18): Threatening or scaring off some of the less committed members of Jaxx's gang to slow them down.
Chase Conclusion:
If the players succeed in enough checks (typically 3-5 successful skill checks), they manage to:
Escape the museum, losing Jaxx and his gang in the process. They might find a secret passage, lock the gang behind them, or use the environment to trap their pursuers.
Outmaneuver Jaxx long enough to get a head start, giving them time to plan their next move.
If the players fail too many checks, Jaxx and his gang catch up to them, leading to:
A final confrontation where the players must either negotiate or fight to keep the artefacts.
If Jaxx wins, he takes the artefacts, leaving the players to deal with the consequences of failing the heist.
Scenario 3: The Dragon from the Hell Realm Chases the Sewer Rats
If the players are in the Infernal Hell Realm but are not directly engaged with the Dragon, it will first encounter one of the Sewer Rats who may have also been transported into the Hell Realm with the players.
Dragon vs. Sewer Rats:
The Dragon initially chases one of the Sewer Rats, giving the players time to either plan their escape or use the chaos of the chase to their advantage. The players may:
Assist the Sewer Rats to delay the Dragon's pursuit and make their escape together.
Sabotage the Sewer Rats, leading the Dragon away from them and directly into the path of the authorities.
Chase Skill Checks:
The players must still make unique skill checks each round to navigate the chaos caused by the Dragon chasing the Sewer Rats. Suggested skills for this chase scenario include:
Stealth (DC 13-16): Using the chaotic environment of the Hell Realm to hide and avoid the Dragon's notice.
Survival (DC 14-18): Finding a safe path through the treacherous environment of the Hell Realm.
Acrobatics (DC 14-17): Dodging debris and navigating the collapsing terrain as the Dragon rampages through the area.
Perception (DC 13-16): Spotting dangers in time to avoid them or seeing an opportunity to trap the Dragon.
Deception (DC 14-17): Trick the Sewer Rats into leading the Dragon further away, creating a diversion that gives the players time to escape.
Chase Conclusion:
If the players succeed in enough checks, they either:
Escape while the Dragon continues its rampage against the Sewer Rats, leaving the players free to find their own way back to the Material Plane.
Turn the tables on the Sewer Rats, causing the Dragon to focus entirely on them while the players slip away.
If the players fail too many checks, they may be caught in the Dragon's wrath or forced to battle the Sewer Rats and the Dragon simultaneously.
Appendices
NPC and Monsters
Xanathar Guild
Delaveen Dawngaze
Medium humanoid (elf), Neutral Evil
Armour Class: 15 (Studded Leather)
Hit Points: 66 (12d8 + 12)
Speed: 30 ft.
Abilities: STR: 10 (+0), DEX: 18 (+4), CON: 12 (+1), INT: 16 (+3), WIS: 14 (+2), CHA: 18 (+4)
Saving Throws: Dexterity +7, Charisma +7
Skills: Deception +10, Insight +5, Persuasion +10, Sleight of Hand +7, Stealth +10
Senses: Darkvision 60 ft., Passive Perception 12
Languages: Common, Elvish, Thieves' Cant, Infernal
Challenge Rating: 7 (2,900 XP)
Traits:
Fey Ancestry: Advantage on saving throws against being charmed; immune to sleep magic.
Cunning Action: Can take a bonus action to Dash, Disengage, or Hide.
Mastermind: Can use the Help action as a bonus action and at a range of 30 ft.
Actions:
Multiattack: Delaveen makes two melee attacks.
Rapier: Melee Weapon Attack: +7 to hit, reach 5 ft., one target. Hit: 7 (1d8 + 3) piercing damage.
Poisoned Dagger: Melee Weapon Attack: +7 to hit, reach 5 ft., one target. Hit: 5 (1d4 + 3) piercing damage plus 7 (2d6) poison damage.
Reactions:
Uncanny Dodge: Halve the damage from an attack that hits her.
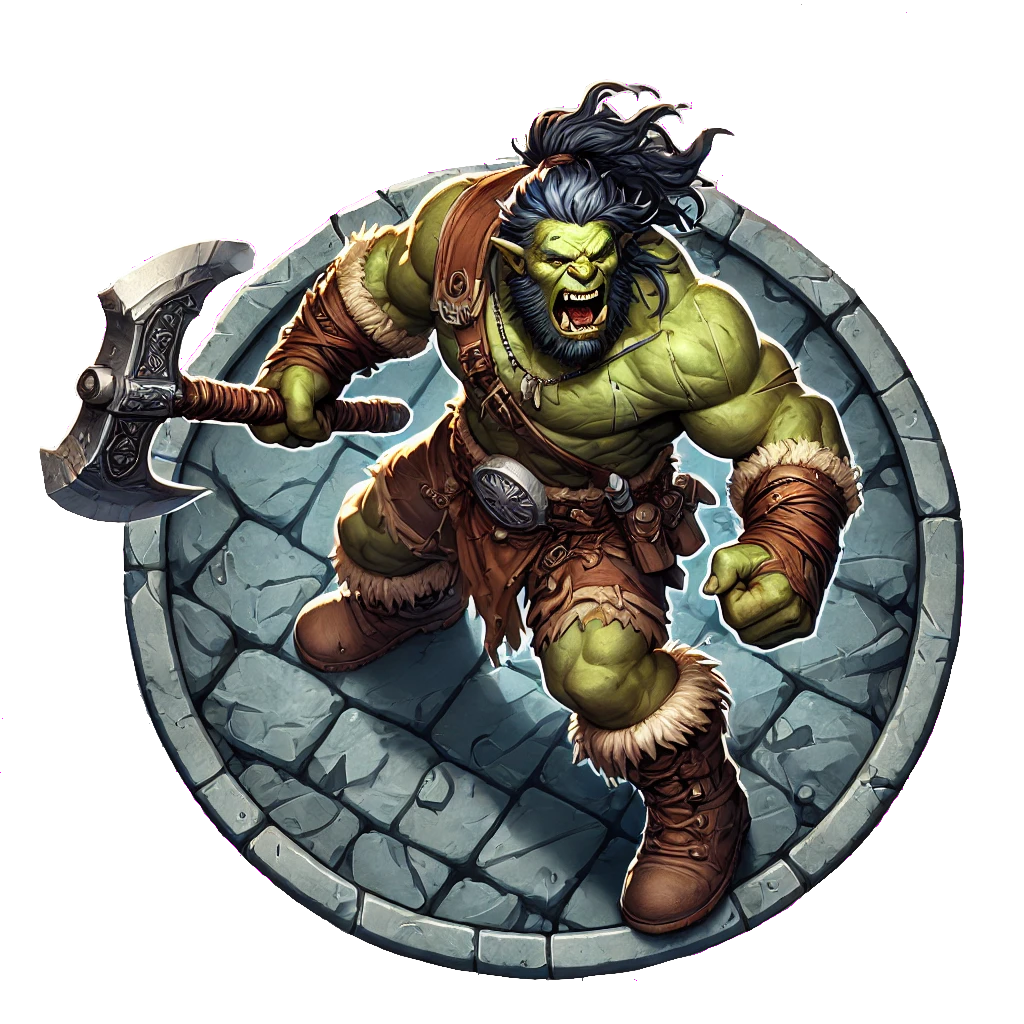
Gorruk "Ironhand" Vargor
Medium humanoid (half-orc), Neutral Evil
Armour Class: 17 (Half Plate)
Hit Points: 123 (13d10 + 52)
Speed: 30 ft.
Abilities: STR: 20 (+5), DEX: 12 (+1), CON: 18 (+4), INT: 10 (+0), WIS: 10 (+0), CHA: 10 (+0)
Saving Throws: Strength +8, Constitution +7
Skills: Athletics +8, Intimidation +5
Damage Resistances: Bludgeoning, Piercing, and Slashing from non-magical attacks
Senses: Darkvision 60 ft., Passive Perception 10
Languages: Common, Orc
Challenge Rating: 7 (2,900 XP)
Traits:
Relentless Endurance: When Gorruk is reduced to 0 hit points but not killed outright, he can drop to 1 hit point instead (once per long rest).
Brutal Critical: Gorruk rolls one additional damage die when determining the extra damage for a critical hit with a melee attack.
Aggressive: As a bonus action, Gorruk can move up to his speed toward a hostile creature he can see.
Heavy Hitter: Gorruk deals an additional +2 damage on all melee weapon attacks.
Actions:
Multiattack: Gorruk makes three melee attacks.
Greataxe: Melee Weapon Attack: +9 to hit, reach 5 ft., one target. Hit: 17 (1d12 + 5) slashing damage.
Spiked Gauntlet: Melee Weapon Attack: +9 to hit, reach 5 ft., one target. Hit: 11 (1d6 + 5) bludgeoning damage plus 7 (2d6) piercing damage.
Reactions:
Unstoppable: When Gorruk is hit by an attack that would drop him below half his hit points, he can use his reaction to gain temporary hit points equal to his Constitution modifier (minimum of 4) until the start of his next turn.
Parry: Gorruk adds +3 to his AC against one melee attack that would hit him.
The Sewer Rat Gang
1. Jaxx Rickard (Leader)
Medium humanoid (human), Chaotic Neutral
Armour Class: 16 (Leather Armour + Dexterity)
Hit Points: 38 (5d8 + 10)
Speed: 30 ft.
Abilities: STR: 10 (+0), DEX: 18 (+4), CON: 14 (+2), INT: 14 (+2), WIS: 12 (+1), CHA: 15 (+2)
Saving Throws: Dexterity +7, Intelligence +4
Skills: Stealth +7, Sleight of Hand +7, Persuasion +6
Senses: Passive Perception 11
Languages: Common, Thieves' Cant
Challenge Rating: 3 (700 XP)
Traits:
Cunning Action: Jaxx can take a bonus action to Dash, Disengage, or Hide.
Sneak Attack (3d6): Jaxx deals an extra 3d6 damage when he has advantage on the attack roll or when an ally is within 5 feet of the target.
Actions:
Rapier: Melee Weapon Attack: +7 to hit, reach 5 ft., one target. Hit: 8 (1d8 + 4) piercing damage.
Poisoned Dagger: Melee Weapon Attack: +7 to hit, reach 5 ft., one target. Hit: 6 (1d4 + 4) piercing damage plus 7 (2d6) poison damage.
Reactions:
Uncanny Dodge: Jaxx halves the damage taken from an attack that hits him.
2. Clint Hillam
Medium humanoid (half-orc), Lawful Neutral
Armour Class: 17 (Chain Mail + Shield)
Hit Points: 44 (4d10 + 16)
Speed: 30 ft.
Abilities: STR: 18 (+4), DEX: 12 (+1), CON: 16 (+3), INT: 10 (+0), WIS: 11 (+0), CHA: 10 (+0)
Saving Throws: Strength +6, Constitution +5
Skills: Athletics +6, Intimidation +4
Senses: Passive Perception 10
Languages: Common, Orc
Challenge Rating: 2 (450 XP)
Traits:
Second Wind: Clint can use a bonus action to regain 1d10+4 hit points once per short rest.
Relentless Endurance: When reduced to 0 hit points but not killed outright, Clint can drop to 1 hit point instead (once per long rest).
Actions:
Greatsword: Melee Weapon Attack: +6 to hit, reach 5 ft., one target. Hit: 11 (2d6 + 4) slashing damage.
Action Surge: Clint can take one additional action on his turn (once per short rest).
3. Willahelm Owston
Small humanoid (gnome), Neutral
Armour Class: 12 (Mage Armour)
Hit Points: 18 (3d6 + 6)
Speed: 25 ft.
Abilities: STR: 8 (-1), DEX: 14 (+2), CON: 12 (+1), INT: 18 (+4), WIS: 12 (+1), CHA: 10 (+0)
Saving Throws: Intelligence +6, Wisdom +3
Skills: Arcana +6, Investigation +6
Senses: Darkvision 60 ft., Passive Perception 11
Languages: Common, Gnomish
Challenge Rating: 2 (450 XP)
Traits:
Gnome Cunning: Willahelm has advantage on Intelligence, Wisdom, and Charisma saving throws against magic.
Illusionist: Willahelm can cast Minor Illusion at will.
Actions:
Fire Bolt: Ranged Spell Attack: +5 to hit, range 120 ft., one target. Hit: 9 (1d10) fire damage.
Mirror Image: Willahelm creates three illusory duplicates of himself to avoid attacks.
Major Image: Willahelm creates an illusion of a creature, object, or force up to a 20-foot cube.
4. Vaius Vrago
Medium humanoid (tiefling), Chaotic Neutral
Armour Class: 15 (Scale Mail)
Hit Points: 20 (2d8 + 8)
Speed: 30 ft.
Abilities: STR: 12 (+1), DEX: 14 (+2), CON: 14 (+2), INT: 10 (+0), WIS: 16 (+3), CHA: 14 (+2)
Saving Throws: Wisdom +5, Charisma +3
Skills: Religion +4, Deception +4
Senses: Darkvision 60 ft., Passive Perception 13
Languages: Common, Infernal
Challenge Rating: 1 (200 XP)
Traits:
Hellish Resistance: Vaius has resistance to fire damage.
Invoke Duplicity: Vaius can create a duplicate to distract enemies or help allies.
Actions:
Inflict Wounds: Melee Spell Attack: +4 to hit, reach 5 ft., one target. Hit: 17 (3d10) necrotic damage.
Bless: Vaius blesses up to three creatures, adding 1d4 to their attack rolls or saving throws.
5. Faral Mooncairn
Medium humanoid (half-elf), Neutral Evil
Armour Class: 14 (Studded Leather)
Hit Points: 24 (3d8 + 6)
Speed: 30 ft.
Abilities: STR: 10 (+0), DEX: 16 (+3), CON: 14 (+2), INT: 13 (+1), WIS: 11 (+0), CHA: 18 (+4)
Saving Throws: Dexterity +4, Charisma +6
Skills: Deception +6, Performance +6
Senses: Darkvision 60 ft., Passive Perception 11
Languages: Common, Elvish
Challenge Rating: 2 (450 XP)
Traits:
Cutting Words: Faral can use a Bardic Inspiration die to subtract from an enemy's attack roll, ability check, or damage roll.
Psychic Blades: Faral can imbue his weapon attacks with psychic damage.
Actions:
Vicious Mockery: Ranged Spell Attack: +6 to hit, range 60 ft., one target. Hit: 3 (1d4) psychic damage and disadvantage on the target's next attack.
6. Holly Lincoln
Medium humanoid (human), Neutral Good
Armour Class: 14 (Leather Armour)
Hit Points: 22 (2d10 + 4)
Speed: 30 ft.
Abilities: STR: 12 (+1), DEX: 16 (+3), CON: 14 (+2), INT: 10 (+0), WIS: 13 (+1), CHA: 10 (+0)
Saving Throws: Dexterity +5, Constitution +4
Skills: Perception +4, Stealth +5
Senses: Passive Perception 14
Languages: Common
Challenge Rating: 1 (200 XP)
Traits:
Hunter's Mark: Holly can mark a target, dealing an extra 1d6 damage to that creature with weapon attacks.
Horde Breaker: Once per turn, Holly can make a weapon attack against a different creature within 5 feet of the original target.
Actions:
Longbow: Ranged Weapon Attack: +5 to hit, range 150/600 ft., one target. Hit: 7 (1d8 + 3) piercing damage.
7. Shaye Browne
Small humanoid (halfling), Neutral Evil
Armour Class: 15 (Leather Armour + Dexterity)
Hit Points: 30 (4d8 + 8)
Speed: 25 ft.
Abilities: STR: 10 (+0), DEX: 18 (+4), CON: 14 (+2), INT: 14 (+2), WIS: 12 (+1), CHA: 10 (+0)
Saving Throws: Dexterity +7, Intelligence +4
Skills: Stealth +7, Deception +6, Sleight of Hand +7
Senses: Passive Perception 11
Languages: Common, Halfling
Challenge Rating: 2 (450 XP)
Traits:
Assassinate: Shaye has advantage on attack rolls against creatures that haven't acted yet. Any hit she scores against a surprised creature is a critical hit.
Halfling Nimbleness: Shaye can move through the space of any creature that is of a size larger than hers.
Actions:
Dagger: Melee Weapon Attack: +7 to hit, reach 5 ft., one target. Hit: 6 (1d4 + 4) piercing damage.
Poisoned Blade: Shaye applies poison to her weapon. On hit, the target takes an additional 7 (2d6) poison damage.
8. Abbie Miles
Medium humanoid (half-elf), Chaotic Neutral
Armour Class: 13 (Mage Armour)
Hit Points: 9 (1d6 + 3)
Speed: 30 ft.
Abilities: STR: 10 (+0), DEX: 14 (+2), CON: 12 (+1), INT: 12 (+1), WIS: 10 (+0), CHA: 16 (+3)
Saving Throws: Constitution +4, Charisma +5
Skills: Arcana +4, Deception +6
Senses: Darkvision 60 ft., Passive Perception 10
Languages: Common, Elvish
Challenge Rating: 1 (200 XP)
Traits:
Wild Magic Surge: Abbie rolls on the Wild Magic Surge table whenever she casts a spell of 1st level or higher.
Tides of Chaos: Once per long rest, Abbie can gain advantage on one attack roll, ability check, or saving throw.
Actions:
Chaos Bolt: Ranged Spell Attack: +5 to hit, range 120 ft., one target. Hit: 11 (2d8 + 1d6) random damage type (chosen by rolling).
9. Chrystan Seratolva
Medium humanoid (wood elf), Neutral Good
Armour Class: 14 (Hide Armour)
Hit Points: 20 (2d8 + 8)
Speed: 35 ft.
Abilities: STR: 12 (+1), DEX: 14 (+2), CON: 14 (+2), INT: 13 (+1), WIS: 16 (+3), CHA: 10 (+0)
Saving Throws: Wisdom +5, Intelligence +4
Skills: Nature +4, Survival +5
Senses: Darkvision 60 ft., Passive Perception 13
Languages: Common, Elvish
Challenge Rating: 2 (450 XP)
Traits:
Wild Shape: Chrystan can transform into a beast with a challenge rating of 1 or lower (e.g., a wolf or panther) as a bonus action.
Elf Weapon Training: Chrystan is proficient with longbows, shortbows, and longswords.
Actions:
Shillelagh: Melee Weapon Attack: +5 to hit, reach 5 ft., one target. Hit: 7 (1d8 + 3) bludgeoning damage (using her Wisdom modifier).
Moonbeam: Chrystan calls down a beam of light, dealing 13 (2d10) radiant damage to creatures that enter or start their turn in the area (Concentration, up to 1 minute).
10. Dagan Wilcox
Medium humanoid (half-orc), Chaotic Neutral
Armour Class: 13 (UnArmoured Defense)
Hit Points: 15 (1d12 + 3)
Speed: 30 ft.
Abilities: STR: 16 (+3), DEX: 14 (+2), CON: 14 (+2), INT: 8 (-1), WIS: 10 (+0), CHA: 10 (+0)
Saving Throws: Strength +5, Constitution +4
Skills: Athletics +5, Intimidation +2
Senses: Darkvision 60 ft., Passive Perception 10
Languages: Common, Orc
Challenge Rating: 1 (200 XP)
Traits:
Rage: Dagan enters a rage as a bonus action, gaining advantage on Strength checks and saving throws, a +2 bonus to melee damage, and resistance to bludgeoning, piercing, and slashing damage.
Reckless Attack: Dagan can attack with advantage on melee attacks, but attacks against him also have advantage until his next turn.
Actions:
Greataxe: Melee Weapon Attack: +5 to hit, reach 5 ft., one target. Hit: 10 (1d12 + 3) slashing damage.
Hellhound
Medium fiend, lawful evil
Armour Class: 15 (Natural Armour)
Hit Points: 45 (7d8 + 14)
Speed: 50 ft.
Abilities: STR: 17 (+3), DEX: 12 (+1), CON: 14 (+2), INT: 6 (-2), WIS: 13 (+1), CHA: 6 (-2)
Saving Throws: Dexterity +3, Constitution +4, Wisdom +3
Skills: Perception +5
Damage Resistances: Fire
Senses: Darkvision 60 ft., Passive Perception 15
Languages: Understands Infernal but can't speak it
Challenge Rating: 3 (700 XP)
Traits:
Keen Hearing and Smell: The hellhound has advantage on Wisdom (Perception) checks that rely on hearing or smell.
Pack Tactics: The hellhound has advantage on an attack roll against a creature if at least one of the hellhound's allies is within 5 feet of the creature and the ally isn't incapacitated.
Actions:
Bite: Melee Weapon Attack: +5 to hit, reach 5 ft., one target. Hit: 7 (1d8 + 3) piercing damage plus 7 (2d6) fire damage.
Fire Breath (Recharge 5-6): The hellhound exhales fire in a 15-foot cone. Each creature in that area must make a DC 12 Dexterity saving throw, taking 21 (6d6) fire damage on a failed save, or half as much damage on a successful one.
Spectral Dragon
Huge undead dragon, Neutral Evil
Armour Class: 18 (Natural Armour)
Hit Points: 150 (20d12 + 20)
Speed: 40 ft., fly 80 ft. (hover)
Abilities: STR: 22 (+6), DEX: 14 (+2), CON: 14 (+2), INT: 16 (+3), WIS: 12 (+1), CHA: 18 (+4)
Saving Throws: Dexterity +6, Constitution +6, Wisdom +5, Charisma +8
Damage Resistances: Necrotic, Cold, Bludgeoning, Piercing, and Slashing from non-magical attacks
Damage Immunities: Poison, Psychic
Condition Immunities: Charmed, Exhaustion, Frightened, Paralyzed, Poisoned
Senses: Darkvision 120 ft., Passive Perception 14
Languages: Draconic, Common
Challenge Rating: 10 (5,900 XP)
Traits:
Spectral Flight: The Spectral Dragon can fly through solid objects as though they were difficult terrain. If it ends its turn inside a solid object, it takes 10 (3d6) force damage.
Incorporeal Movement: The Spectral Dragon can move through other creatures and objects as if they were difficult terrain. It takes 5 (1d10) force damage if it ends its turn inside an object.
Legendary Resistance (3/Day): If the Spectral Dragon fails a saving throw, it can choose to succeed instead.
Frightful Presence: Each creature of the dragon's choice within 120 feet of the dragon and aware of it must succeed on a DC 16 Wisdom saving throw or become frightened for 1 minute. A frightened target can repeat the saving throw at the end of each of its turns, ending the effect on itself on a success.
Actions:
Multiattack: The Spectral Dragon makes three attacks: one with its bite and two with its claws.
Bite: Melee Weapon Attack: +10 to hit, reach 10 ft., one target. Hit: 19 (2d10 + 6) piercing damage plus 7 (2d6) necrotic damage.
Claw: Melee Weapon Attack: +10 to hit, reach 5 ft., one target. Hit: 13 (2d6 + 6) slashing damage.
Spectral Breath (Recharge 5-6): The Spectral Dragon exhales a cone of ghostly, necrotic energy in a 60-foot cone. Each creature in that area must make a DC 17 Constitution saving throw, taking 45 (10d8) necrotic damage on a failed save, or half as much on a successful one.
Legendary Actions (3/Day):
Spectral Phase: The Spectral Dragon moves up to half its speed without provoking opportunity attacks.
Tail Swipe: Melee Weapon Attack: +10 to hit, reach 15 ft., one target. Hit: 15 (2d8 + 6) bludgeoning damage.
Chilling Gaze (Costs 2 Actions): The dragon targets one creature it can see within 60 feet of it. The target must succeed on a DC 16 Constitution saving throw or take 21 (6d6) cold damage and be paralyzed until the end of its next turn.
Lair Actions (Optional for Chase Scene):
During the chase through the haunted domain, the Spectral Dragon may activate lair actions at initiative count 20 (losing initiative ties):
Spectral Shadows: Shadows of the dragon's past victims rise to block the path. Creatures must make a DC 14 Dexterity saving throw or be restrained by spectral hands until the end of their next turn.
Haunting Wail: A wail fills the air, forcing all creatures within 120 feet to make a DC 14 Wisdom saving throw or be frightened for 1 minute. A frightened target can repeat the saving throw at the end of each of its turns, ending the effect on itself on a success.
Chase Mechanics:
During the chase, the Spectral Dragon uses its Spectral Flight and Incorporeal Movement to pass through solid structures, gaining an advantage in narrow spaces. It may also use Spectral Phase to teleport short distances, adding an element of unpredictability to the chase. The players must navigate through difficult terrain, dodge environmental hazards (like collapsing walls), and avoid Frightful Presence or be slowed down by fear.
Curses
Curse of Blind Optimism (Inverted Observant Feat)
Effect: The player becomes overconfident, missing critical details.
Curse Effect: The character suffers a -5 penalty to passive Perception and passive Investigation, causing traps, hidden enemies, and clues to go unnoticed. Additionally, they misinterpret situations due to overconfidence.
Based on: The Observant Feat, which normally grants a +5 bonus to Perception and Investigation.
Curse of Miscommunication (Inverted Linguist Feat)
Effect: The player struggles with understanding and communication.
Curse Effect: The character forgets previously known languages and misinterprets conversations, suffering disadvantage on Persuasion, Deception, and Insight checks. They also cannot learn new languages until the curse is lifted.
Based on: The Linguist Feat, which grants additional language proficiency and cipher creation.
Curse of the Fragile Mind (Inverted Resilient Feat)
Effect: The player becomes mentally vulnerable.
Curse Effect: The character has disadvantage on saving throws for one ability score and disadvantage on concentration checks.
Based on: The Resilient Feat, which normally grants proficiency in one saving throw.
Curse of Chaotic Spells (Inverted Spell Sniper Feat)
Effect: The player's magic becomes unpredictable.
Curse Effect: A 25% chance for spells to misfire, affecting random targets. Spell range is halved, and attack rolls for spells are made with disadvantage.
Based on: The Spell Sniper Feat, which increases spell range and allows spells to ignore cover.
Curse of Feeble Strikes (Inverted Sharpshooter Feat)
Effect: The player's attacks become weak and inaccurate.
Curse Effect: A -5 penalty on all ranged or melee attack rolls, and regular attacks deal -10 damage. This makes the character less effective in combat and prone to missing high-risk shots.
Based on: The Sharpshooter Feat, which normally enhances ranged combat and damage.
Curse of the Enfeebled (Inverted Tough Feat)
Effect: The player becomes physically frail.
Curse Effect: The character's maximum HP is reduced by 2 per level.
Based on: The Tough Feat, which typically increases HP by 2 per level.
Curse of Recklessness (Inverted Defensive Duelist Feat)
Effect: The player becomes rash in combat.
Curse Effect: The character cannot take reactions and suffers a -2 penalty to AC after missing an attack.
Based on: The Defensive Duelist Feat, which usually allows reactions to add proficiency bonus to AC.
Curse of Fragile Magic (Inverted War Caster Feat)
Effect: The player's control over magic becomes unstable.
Curse Effect: Disadvantage on concentration checks, and a DC 10 Intelligence (Arcana) check is required to successfully cast reaction spells. Additionally, the character cannot cast spells while holding a weapon or shield.
Based on: The War Caster Feat, which normally helps maintain concentration and allows casting with a weapon or shield.
Curse of Burdened Step (Inverted Athlete Feat)
Effect: The player's movements become sluggish.
Curse Effect: Jump distance is halved, and standing up from prone requires all movement. Disadvantage on Athletics checks involving running, climbing, or jumping.
Based on: The Athlete Feat, which normally improves movement and jump abilities.
Curse of Impulsive Aggression (Inverted Sentinel Feat)
Effect: The player's urge to attack clouds their judgement.
Curse Effect: The character cannot use reactions, but creatures disengaging from them still provoke opportunity attacks. After making an opportunity attack, they lose their next turn.
Based on: The Sentinel Feat, which normally grants powerful reaction-based combat control.
Curse of Fading Resilience (Inverted Durable Feat)
Effect: The player's resilience fades.
Curse Effect: The character heals half as much when using Hit Dice and suffers a -1 penalty to Constitution saving throws.
Based on: The Durable Feat, which improves healing from Hit Dice and Constitution saving throws.
Curse of Misguided Instinct (Inverted Alert Feat)
Effect: The player's instincts dull, leaving them vulnerable to ambushes.
Curse Effect: A -5 penalty to initiative rolls, and the character can be surprised. Enemies attacking from stealth or invisibility have advantage.
Based on: The Alert Feat, which normally grants immunity to being surprised and boosts initiative.
Curse of Shattered Precision (Inverted Sharpshooter Feat)
Effect: The player's aim becomes shaky.
Curse Effect: A -5 penalty to attack rolls with ranged weapons, automatic misses on long-range attacks, and disadvantage on attacks against targets behind cover.
Based on: The Sharpshooter Feat, which improves ranged attack accuracy and damage.
Curse of Fragile Body (Inverted Heavy Armour Master Feat)
Effect: The player's body becomes vulnerable to physical attacks.
Curse Effect: The character takes an additional +3 damage from bludgeoning, piercing, or slashing attacks.
Based on: The Heavy Armour Master Feat, which reduces damage from these types of attacks.
Curse of Scattered Focus (Inverted Keen Mind Feat)
Effect: The player's mind becomes clouded.
Curse Effect: The character forgets important details, suffers disadvantage on Intelligence (History) checks, and frequently loses their sense of direction and time.
Based on: The Keen Mind Feat, which normally enhances memory and directional awareness.
Curse of Weakened Will (Inverted Inspiring Leader Feat)
Effect: The player's ability to inspire others diminishes.
Curse Effect: Disadvantage on Charisma checks for leadership, and allies cannot gain temporary hit points from any source within 30 feet of the character.
Based on: The Inspiring Leader Feat, which typically allows a player to grant temporary hit points to allies.
Curse of Shattered Balance (Inverted Athlete Feat)
Effect: The player's balance and coordination deteriorate.
Curse Effect: Disadvantage on Dexterity checks involving balance, halved climbing and swimming speed, and frequent tripping or stumbling.
Based on: The Athlete Feat, which improves movement and balance.
Curse of Fumbling Strikes (Inverted Martial Adept Feat)
Effect: The player's mastery of combat manoeuvres fades.
Curse Effect: A DC 15 Dexterity saving throw is required to succeed in combat manoeuvres, and the character cannot benefit from superiority dice or similar abilities.
Based on: The Martial Adept Feat, which grants combat manoeuvres and superiority dice.
Curse of Enfeebled Strength (Inverted Great Weapon Master Feat)
Effect: The player's attacks lack power.
Curse Effect: A -5 penalty on melee attack rolls, no extra damage on critical hits, and no additional attacks when reducing enemies to 0 HP.
Based on: The Great Weapon Master Feat, which grants extra attacks and higher damage.
Curse of Slowed Reflexes (Inverted Mobile Feat)
Effect: The player's reflexes become sluggish.
Curse Effect: The character's movement speed is reduced by 10 feet, and they cannot disengage without provoking opportunity attacks. Additionally, they suffer disadvantage on Dexterity saving throws.
Based on: The Mobile Feat, which normally increases speed and allows safer disengagement.
Curse of Blunted Attacks (Inverted Polearm Master Feat)
Effect: The player's proficiency with polearms diminishes.
Curse Effect: Disadvantage on attacks with polearms, inability to make opportunity attacks when creatures enter their reach, and slower reactions.
Based on: The Polearm Master Feat, which typically enhances reach weapon effectiveness.